When it comes to cooking beef, choosing the right cut can make all the difference in the final dish. Imagine trying to build a house with only a hammer and nails – while it may be possible, it certainly won’t be easy or efficient. Similarly, choosing the wrong cut of beef can result in tough, chewy meat or a dish that lacks flavor.
That’s why understanding the different types of cuts and their qualities is essential for any aspiring home cook or professional chef. This article will explore the vast world of beef cuts, from the tenderloin to the chuck steak. We’ll discuss the different qualities of each cut, including flavor, texture, and tenderness, and provide tips on choosing the perfect one for your dish.
Whether you’re looking for a budget-friendly option or a premium cut for a special occasion, we’ve got you covered. So, let’s dive into the world of beef cuts and discover how to create delicious, mouthwatering dishes that will impress your family and friends.
Key Takeaways
- Understanding different meat grades is crucial for selecting the best beef cut for roast, with choice or prime cuts offering tenderness, juiciness, and flavor.
- Proper seasoning techniques, such as garlic slices and a robust pot roast seasoning mix, enhance the flavor of roast beef.
- Oven roasting techniques include preheating the oven, searing the meat, slow-roasting at lower temperatures while basting occasionally, and resting before carving to achieve tender and juicy results.
To ensure consistently perfect roast beef every time, there are a few expert tips that can make all the difference. First and foremost, choosing the right cut of beef is crucial. Look for cuts like ribeye or tenderloin with good marbling for maximum flavor and tenderness.
Secondly, properly seasoning the roast with salt and pepper before cooking adds depth of flavor to the meat. It’s also important to let the seasoned roast sit at room temperature for about an hour before cooking to ensure even cooking throughout.
Thirdly, investing in a digital meat thermometer is essential for achieving the desired level of doneness. Insert it into the thickest part of the roast without touching any fat or bone to monitor its internal temperature accurately.
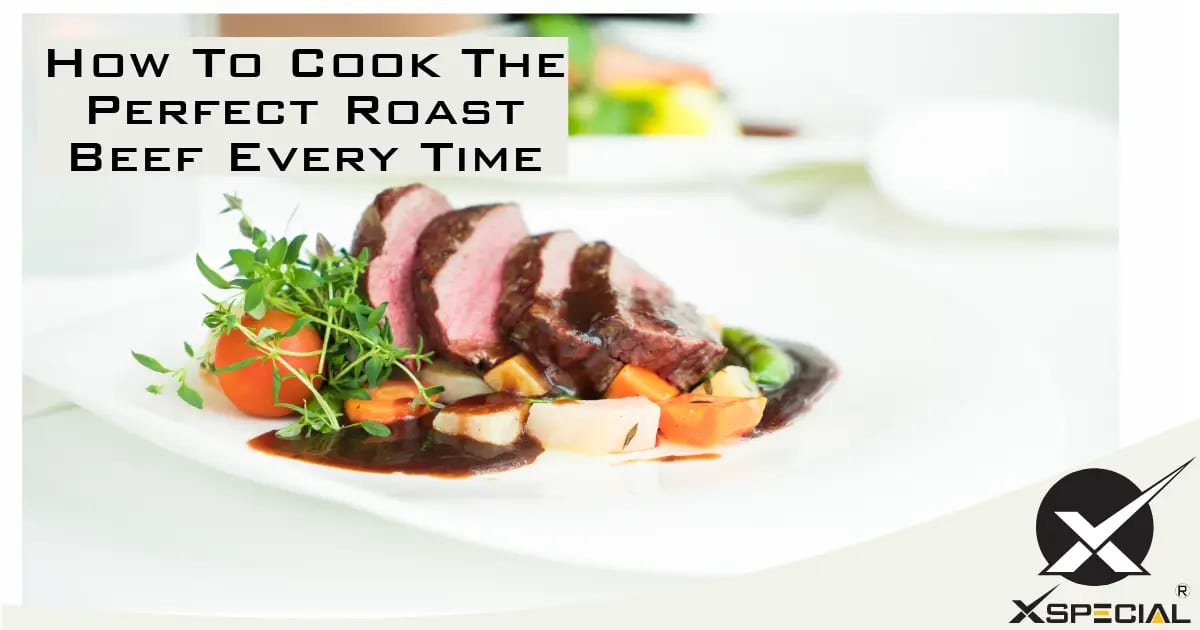
Roasting beef can be daunting, but have you ever dreamed of cooking that perfect roast beef every time? It’s all about mastering the low and slow approach, giving your roast the time it needs to bring out its optimum flavors.
This comprehensive guide will lead you through selecting the best cut of beef, offering expert tips on seasoning, roasting techniques, and carving for maximum juiciness. Let’s dive in and turn you into a roast master!
Choosing the Best Beef for Roast
When choosing the best beef for roast, understanding different meat grades and their impact on cooking is crucial.
Understanding Different Meat Grades and Their Impact on Cooking
Deciphering the USDA’s beef grading system is a vital step in cooking the perfect roast beef every time. This two-dimensional system evaluates quality grades for tenderness, juiciness, and flavor alongside yield grades detailing the amount of usable lean meat.
High-quality cuts such as choice or prime guarantee your roast beef will be tender, juicy, and flavorful.
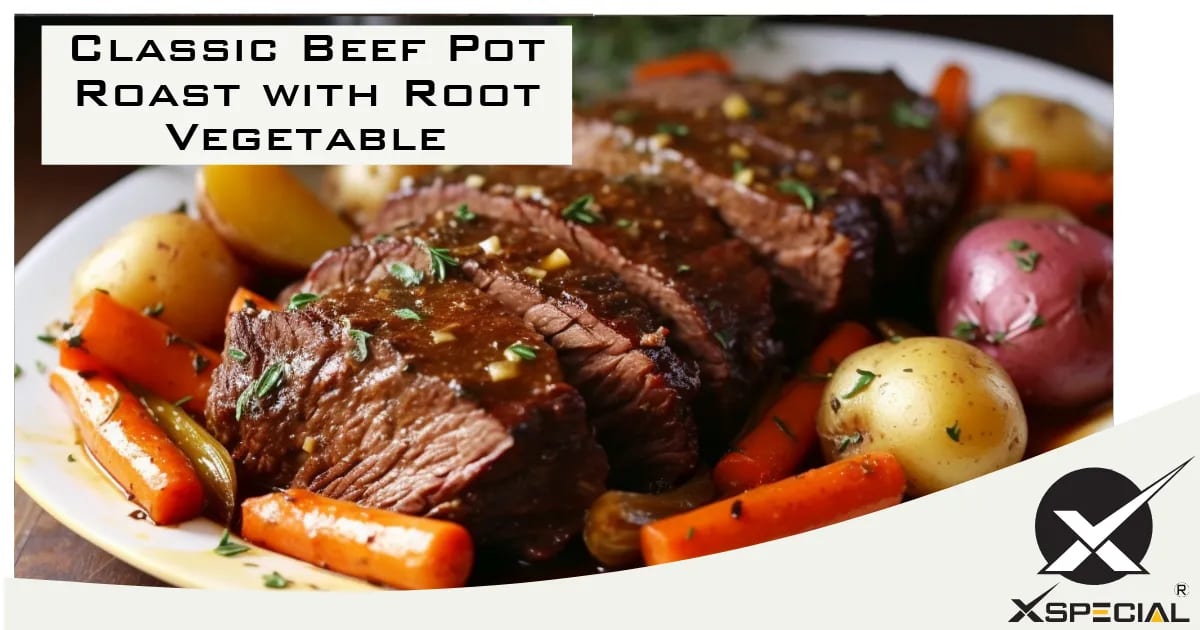
The variety of available cuts can impact not only the taste but also the cooking process itself. Different cuts have distinct levels of tenderness and marbling, which affect how they cook; from a rump roast to a bone-in rib cut, each offers an exceptional texture and palate-captivating savoriness essential for an unbeatable roast beef experience.
Therefore, understanding these meat grades proves crucial in selecting just-the-right cuts when aiming at achieving that melt-in-your-mouth deliciousness with every bite you take off your perfectly cooked dish.
Seasoning and Preparing the Roast
Properly seasoning the roast is essential for maximum flavor. From bold XL meat tenderizer tools to flavorful marinades, discover the secrets to creating a mouthwatering roast beef that will leave your guests begging for more.
Properly Seasoning the Roast for Maximum Flavor
Selecting the right seasoning is the secret to succulently tender roast beef that bursts with flavor in every bite. To achieve this culinary masterpiece, start by inserting garlic slices into your cut of beef.
Apply a lather of olive oil next, creating a sticky surface for your dry seasonings to adhere to. A robust pot roast seasoning mix including brown sugar, Spanish paprika, black pepper, sea salt, and garlic powder adds layers of nuanced flavors to your best roast beef recipe.
Aim for 2 tablespoons of this delicious concoction per pound of meat for an optimal taste sensation. This initial preparation stage might seem meticulous, but it’s these small details that promise perfectly flavored and melt-in-your-mouth roast beef every time you serve it up at dinner.
Trussing the Roast for Even Cooking
Trussing the roast beef is a critical step in achieving an evenly cooked, tender, and juicy result. Here’s how you can do it:
- Start by selecting your choice cut of beef. Suitable options include a chuck roast, sirloin tip roast, or round roast.
- Purchase a roll of butcher’s twine or kitchen string, which you’ll use to truss the roast.
- Place your cut of beef on a stable cutting board or surface.
- Cut twine lengths sufficient to wrap around the breadth and length of your roast.
- Tightly tie the twine around the roast, ensuring it maintains its shape while it cooks.
- If your recipe requests it, keep the string on during cooking to help maintain the shape of the meat and ensure even cooking.
- Remember that trussing is not limited to oven roasting; it can be applied to various methods like slow cooking or grilling for optimal results.
- Trussing is particularly beneficial for tougher cuts such as chuck roast, which usually require slow cooking to break down connective tissues and yield tender meat.
Cooking the Roast
Determining the cooking time and temperature is crucial for achieving a perfectly cooked roast beef. But that’s not all. There are oven-roasting techniques you need to master to ensure your roast comes out tender and juicy every time.
Curious to know more? Keep reading!
Determining the Cooking Time and Temperature
To cook the perfect roast beef, it is crucial to determine the right cooking time and temperature. Here are some key factors to consider:
- Use a meat thermometer: Invest in a reliable meat thermometer to accurately measure the roast’s internal temperature. This will help you avoid undercooking or overcooking the meat.
- Calculate cook time based on weight: As a general rule, plan for about 13-15 minutes of cooking per pound for rare roast beef, 17-19 minutes per pound for medium, and 22-25 minutes per pound for well-done.
- Consider the desired level of doneness: Adjust the cooking time according to your preference for doneness. Remember that cooking times may vary depending on the cut and thickness of the roast.
- Start with high heat, then reduce: Some recipes recommend starting with a higher oven temperature (around 450°F) for about 15 minutes to sear the outside of the roast and then reducing the heat to around 325°F for even cooking throughout.
- Consistent temperature throughout Other recipes suggests roasting at a steady oven temperature without any initial searing step. This approach can result in more even cooking.
- Use online resources as reference: Consult roast beef cooking time calculators and temperature charts available online to get precise guidelines based on your specific roast weight and desired level of doneness.
Oven Roasting Techniques for Perfectly Cooked Roast Beef
To achieve perfectly cooked roast beef, it’s essential to master the oven-roasting technique. Here are some techniques to follow:
- Preheat your oven: Start by preheating your oven to 375 degrees F. This ensures that the roast beef cooks evenly and gets a flavorful crust.
- Season and sear the roast: Generously season the roast with salt, pepper, and any desired herbs or spices. Then, heat a large skillet over high heat and sear the meat on all sides until it forms a brown crust. This step helps enhance the flavor and locks in the juices.
- Use a roasting rack: Place a roasting rack in a large roasting pan and place the seared roast on top of it. The rack allows air to circulate around the meat, promoting even cooking.
- Insert a meat thermometer: Insert a meat thermometer into the thickest part of the roast, ensuring it doesn’t touch any bones or fat. This helps you monitor the internal temperature accurately.
- Slow-roast at a lower temperature: Roast the beef at 250 degrees F for an extended period of time, allowing it to cook slowly and become tender. For medium-rare doneness (recommended), cook until the internal temperature reaches about 135 degrees F.
- Baste occasionally: While the roast is cooking, baste it with juices or beef broth every 30 minutes or so. This adds moisture and flavor while preventing dryness.
- Remove from oven at desired doneness: Once your roast beef reaches your preferred level of doneness based on its internal temperature (e.g., medium-rare at 135 degrees F), take it out of the oven promptly to avoid overcooking.
- Let it rest before carving: After removing it from the oven, tent loosely with aluminum foil and let the roast rest for about 15-20 minutes before cutting. This allows the juices to redistribute throughout the meat, resulting in a more succulent and tender roast.
- Carve against the grain: When carving the roast beef, make sure to slice against the grain for maximum tenderness. Cutting across the muscle fibers helps break them down, resulting in more tender slices.
- Serve and enjoy: Serve your perfectly cooked roast beef with your favorite sides and sauces. The result will be a melt-in-your-mouth roast beef that impresses everyone at your table.
Resting and Carving the Roast
Resting the roast after cooking is crucial to allow the juices to redistribute and ensure a juicy and tender result. Carving the roast properly will further enhance its flavor and presentation.
Learn how to master these essential steps for an unforgettable roast beef experience. Read more here.
Importance of Resting the Roast Before Carving
Resting the roast before carving is crucial in achieving the perfect roast beef. During cooking, the heat causes the juices in the meat to move toward the surface. If you immediately carve into the roast, those flavorful juices will escape, resulting in a dry and less tasty cut of meat.
However, by allowing the roast to rest for at least 10 minutes after removing it from the oven, these precious juices have time to settle back into the meat’s fibers. This not only helps retain its moisture but also enhances tenderness and flavor.
So resist that temptation to dig right in and let your roast beef rest before carving for a melt-in-your-mouth dining experience.
Tips for Carving the Roast to Maintain Juiciness
To maintain the juiciness of your roast beef during carving, follow these tips:
- Let it rest: Allow the roasted beef to rest for 15-20 minutes before carving. This allows the juices to redistribute throughout the meat, producing a more flavorful and tender roast.
- Use a sharp carving knife: A sharp carving knife will make clean, precise cuts through the meat without tearing or shredding it. This helps to maintain the juiciness and overall quality of the roast.
- Slice against the grain: When carving, make sure to cut against the grain of the meat. This ensures that each slice is tender and easy to chew, as cutting with the grain can result in tougher, less juicy pieces.
- Cut thin slices: Aim to cut thin slices of roast beef for maximum tenderness and juiciness. Keeping the slices under 1/4 inch in thickness makes them easier to chew and enjoy.
- Serve immediately: Carve only what you plan on serving immediately. Leaving sliced roast beef exposed to air for too long can cause it to dry out quickly, compromising its juiciness.
Storing and Using Leftover Roast Beef
Properly storing leftover roast beef is essential for maintaining its freshness. Discover creative and delicious ways to utilize your leftovers, making the most of your roast beef experience.
Read on to find out more!
Proper Storage Techniques for Extended Freshness
To ensure your roast beef stays fresh and flavorful for longer, it’s important to follow proper storage techniques. Take note of these tips:
- Store in the Refrigerator: After cooking, allow the roast beef to cool completely before refrigerating. Place it in an airtight container or wrap it tightly in plastic wrap to prevent air from reaching the meat.
- Use Within 3-5 Days: Leftover roast beef can be stored safely in the refrigerator for 3-5 days. Be sure to consume it within this timeframe to maintain its freshness.
- Freeze for Extended Freshness: If you have more roast beef than you can consume within a few days, consider freezing it for later use. Wrap the meat tightly in aluminum foil or freezer-safe plastic wrap, ensuring no air pockets. Then place it in a freezer bag with all excess air removed.
- Date and Label: To keep track of how long your roast beef has been stored, always label the container or package with the date it was cooked or frozen.
- Optimal Freezer Storage Time: For best quality, use frozen roast beef within 4-12 months. While it may still be safe after this time, the flavor and texture may deteriorate gradually.
- Thaw Properly: When ready to use frozen roast beef, thaw it slowly in the refrigerator overnight rather than at room temperature to prevent bacterial growth.
- Avoid Repeated Thawing and Refreezing: Each time you thaw and refreeze meat, moisture loss occurs, which can affect its quality. It’s best only to thaw what you plan on using.
- Vacuum-Sealed Portions: If you regularly purchase deli-style roast beef from your local market, ask them to vacuum-seal portions for extended freshness in the refrigerator.
Creative and Delicious Ways to Utilize Leftover Roast Beef
Leftover roast beef can be transformed into various creative and delicious meals. Here are some ideas to make the best use of your roast beef:
- Beef Stroganoff: Make a mouthwatering stroganoff by slicing the leftover roast beef into strips and sautéing it with mushrooms, onions, and a creamy sauce. Serve over egg noodles for a satisfying meal.
- Grilled Cheese Sandwich: Upgrade your classic grilled cheese by adding leftover roast beef slices and cheddar cheese. The combination of melted cheese and tender beef will surely be a hit.
- Stuffed Baked Potatoes: Slice the leftover roast beef into small pieces and mix it with sour cream, shredded cheese, and chives. Stuff this flavorful mixture into baked potatoes for a hearty and delicious meal.
- Beef Curry: Transform your roast beef into a flavorful curry by simmering it with aromatic spices, coconut milk, and vegetables of your choice. Serve over rice or with naan bread for a satisfying Indian-inspired meal.
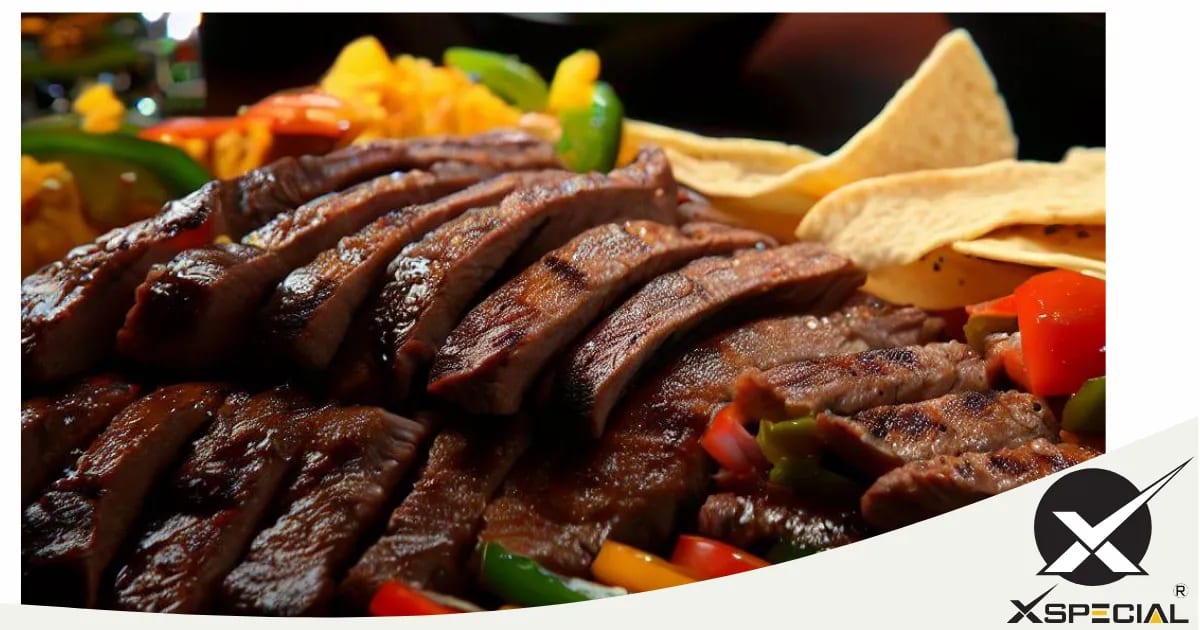
- Roast Beef Tacos: Shred the leftover roast beef and season it with taco seasoning. Warm up tortillas, add the seasoned beef, and top with salsa, avocado, and cilantro for a tasty twist on traditional tacos.
- BBQ Beef Sliders: Toss the leftover roast beef in barbecue sauce and pile it onto slider buns. Top with coleslaw or pickles for a mini sandwich that packs a big flavor.
- Roast Beef Salad: Slice the leftover roast beef thinly and serve it on a bed of mixed greens, cherry tomatoes, cucumbers, and your favorite salad dressing for a refreshing and protein-packed lunch option.
- Roast Beef Hash: Chop the leftover roast beef and diced potatoes, onions, and bell peppers. Cook everything together in a skillet until crispy golden brown for a comforting breakfast or brunch dish.
- Beef and Noodle Soup: Use the leftover roast beef to make a flavorful broth by simmering it with onions, carrots, and celery. Add cooked egg noodles and fresh herbs for a comforting soup perfect for chilly days.
- Roast Beef Pizza: Slice the leftover roast beef thinly and use it as a topping on homemade pizza. Add your favorite sauce, cheese, and other toppings for a unique twist on pizza night.
Serving Suggestions and Additional Tips
Pair your perfectly cooked roast beef with various delicious side dishes and flavorful sauces to enhance the dining experience. From creamy mashed potatoes to roasted vegetables, there’s no shortage of options to complement your tender roast.
Plus, discover expert tips that will guarantee consistently perfect results every time. Don’t miss out on these mouthwatering serving suggestions and valuable additional tips – elevate your roast beef cooking game today!
Pairing Roast Beef with Side Dishes and Sauces
Pairing roast beef with side dishes and sauces is essential to create a well-rounded and flavorful meal. Here are some delicious options to complement your perfectly cooked roast beef:
- Yorkshire Puddings: These crispy and fluffy baked pastries are a classic accompaniment to roast beef. They add a delightful texture and can be filled with gravy.
- Roasted Potatoes: Crispy on the outside and fluffy on the inside, roasted potatoes are a must-have side dish. Toss them with olive oil, salt, and herbs before roasting them for maximum flavor.
- Creamy Horseradish Sauce: This tangy sauce adds a zingy kick to your roast beef. Mix grated horseradish, sour cream, mayonnaise, Dijon mustard, and lemon juice for a creamy and flavorful condiment.
- Steamed Vegetables: Serve a medley of steamed carrots, green beans, or broccoli alongside your roast beef for a healthy and colorful addition to your plate.
- Red Wine Jus: Elevate the flavors of your roast beef with a rich and robust red wine jus. Simmer red wine, beef broth, shallots, garlic, and herbs until reduced into a luscious sauce.
- Garlic Mashed Potatoes: Creamy mashed potatoes infused with roasted garlic make an indulgent pairing for roast beef. Whip boiled potatoes with butter, milk, roasted garlic cloves, salt, and pepper until smooth.
- Honey-Glazed Carrots: Sweeten up your meal with honey-glazed carrots. Cook baby carrots in butter, honey, thyme sprigs, salt, and pepper until tender-crisp to balance out the savory flavors of the roast beef.
- Béarnaise Sauce: This velvety sauce made from egg yolks, clarified butter, white wine vinegar, or tarragon vinegar is perfect for adding an elegant touch to your roast beef. The tangy and buttery taste complements the meat beautifully.
- Crispy Roast Brussels Sprouts: Roasted Brussels sprout halves with a crispy outer layer are a delicious and nutritious side dish. Toss them with olive oil, salt, and pepper before roasting until caramelized.
- Classic Green Salad: Refresh your palate by serving a simple green salad alongside the roast beef. Mix fresh lettuce leaves, cherry tomatoes, cucumber slices, and a light vinaigrette dressing for a light and crisp contrast.
Expert Tips to Ensure Consistently Perfect Roast Beef Every Time
To ensure consistently perfect roast beef every time, a few expert tips can make all the difference. First and foremost, choosing the right cut of beef is crucial. Look for cuts like ribeye or tenderloin that have good marbling for maximum flavor and tenderness.
Secondly, properly seasoning the roast with salt and pepper before cooking adds depth of flavor to the meat. It’s also important to let the seasoned roast sit at room temperature for about an hour before cooking to ensure even cooking throughout.
Thirdly, investing in a digital meat thermometer is essential for achieving the desired level of doneness. Insert it into the thickest part of the roast without touching any fat or bone to accurately monitor its internal temperature.
Conclusion
In conclusion, by following these tips and techniques, you can confidently cook the perfect roast beef every time. Choose the best cut of meat, season it well, and cook it low and slow for tender results.
Remember to let it rest before carving and make use of any leftovers in creative ways. With practice and attention to detail, your roast beef dinners will be a melt-in-your-mouth delight that your family and friends will rave about!
FAQs
Q: How do I cook the perfect roast beef every time?
A: To cook the perfect roast beef every time, start by preheating your oven to 375 degrees Fahrenheit. Season the roast with salt, pepper, and any other desired spices. Place the roast on a rack in a roasting pan, fat side up. Cook the roast for about 20 minutes per pound or until a meat thermometer inserted into the center of the roast reads your desired level of doneness. Let the roast rest for 15-20 minutes before slicing and serving.
Q: What is the best cut of beef to use for roast beef?
A: The best cut of beef for roast beef is usually a tender cut such as a ribeye, tenderloin, or top sirloin. These cuts are known for their tenderness and marbling, which adds flavor and juiciness to the roast.
Q: How long should I cook the roast beef?
A: The cooking time for roast beef depends on the size of the roast and your desired level of doneness. As a general rule, you can estimate about 20 minutes of cooking time per pound of beef. However, it is always recommended to use a meat thermometer to ensure the roast beef reaches your desired level of doneness.
Q: Should I sear the beef before roasting?
A: Searing the beef before roasting can help to develop a rich, caramelized crust on the outside of the roast. This can enhance the flavor and texture of the roast. To sear the beef, heat a pan with oil over high heat and brown the beef on all sides before transferring it to the oven to roast.
Q: Do I need to cover the roast beef while it cooks?
A: It is not necessary to cover the roast beef while it cooks. However, some people prefer to cover the roast with foil for the first portion of the cooking time to help retain moisture. If you choose to cover the roast, be sure to remove the foil for the last portion of the cooking time to allow the exterior to brown and develop a crispy crust.
Q: How do I make beef gravy to serve with the roast?
A: To make beef gravy, start by removing the roast from the pan and setting it aside to rest. Pour off any excess fat from the roasting pan, leaving behind the browned bits on the bottom. Place the pan on the stovetop over medium heat and add a tablespoon or two of flour to the drippings. Stir the flour into the drippings to create a roux. Slowly whisk in beef broth or stock until the gravy reaches your desired consistency. Cook the gravy, stirring constantly, until it thickens—season with salt, pepper, and any other desired herbs or spices.
Q: How do I reheat leftover roast beef?
A: To reheat leftover roast beef, preheat your oven to 325 degrees Fahrenheit. Place the sliced roast beef in a baking dish and add a small amount of beef broth or water to prevent the meat from drying out. Cover the dish with foil and bake for about 15-20 minutes or until the roast beef is heated through. Be careful not to overheat the meat, as it can become dry.
Q: How can I ensure that the roast beef is cooked to the proper temperature?
A: The best way to ensure that the roast beef is cooked to the proper temperature is by using a meat thermometer. Insert the thermometer into the thickest part of the roast, avoiding any bones. For medium-rare roast beef, the internal temperature should be around 135-140 degrees Fahrenheit. For medium roast beef, the internal temperature should be around 145-150 degrees Fahrenheit.
Q: How should I serve roast beef?
A: Roast beef can be served as a main dish alongside vegetables and potatoes, or it can be used to make delicious roast beef sandwiches. To serve, slice the roast beef against the grain into thin slices. Serve with your favorite sides and garnish with fresh herbs, if desired.
Q: Can I make roast beef using your recipe in a slow cooker?
A: Yes, you can make roast beef in a slow cooker. Place the seasoned roast in the slow cooker and add any desired vegetables and broth or stock. Cook on low heat for 8-10 hours or until the beef is tender. Keep in mind that slow cooking will result in a more tender roast, but it may not have the same crispy exterior that roasting in the oven provides.